⛱️ Best Sony Picture Profiles, Custom Settings| Comparing All Sony Film Simulations
- Veres Deni Alex
- Jun 4, 2024
- 6 min read

Updated: Sep 25, 2024
Summer comes with a couple surprises.
For those who might be discovering these custom Sony Picture Profiles for the first time, they're designed to give you authentic film-like looks directly in your Sony camera. Sooo - scroll down to find the best Sony Picture Profiles for you!
Want to test the waters? Check out the 8 free film simulations for Sony cameras!
I wanted to bring a new update to the custom Sony Picture Profiles before the season starts, so everybody can enjoy the improved recipes, and not only that - I've also added 15 new film simulations to the bundle, making them a total of 66!
Comparing the custom profiles - a behind-the-scenes look
I've been working on this update for the past half year, carefully testing each film recipe to see what can be improved to bring them even closer to an authentic film look. Most film recipes received at least small adjustments, while some had a complete makeover, and after reviewing the photos on the big screen some of them will expect even further updates in the future.
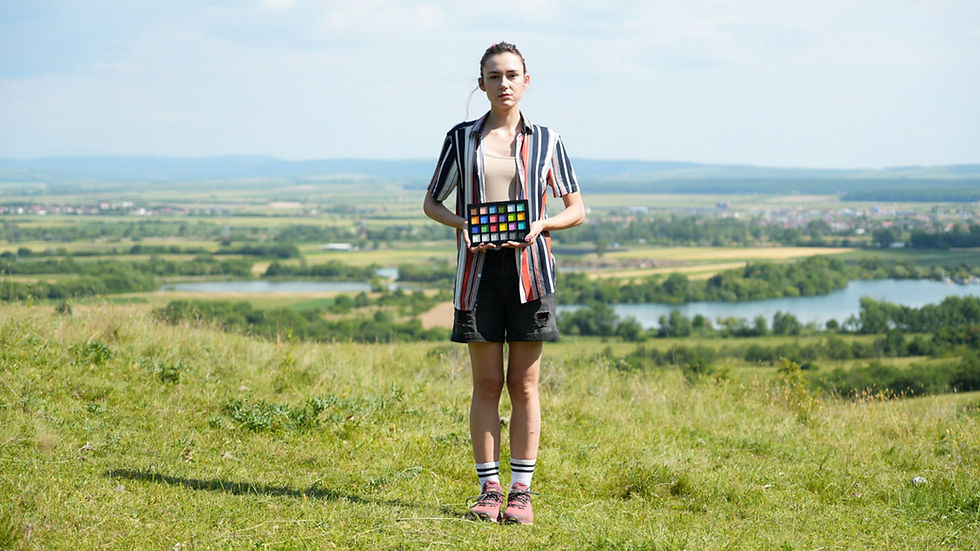
Like always, I chose a location which encompasses a full range of colors, for a clear understanding on how these recipes react in a real world situation.
I've been working on this update for the past 6 months, carefully testing each film recipe to see what can be improved to bring them even closer to an authentic film look. While most recipes received minor tweaks, some underwent complete transformations. Aaand after reviewing the results on a large screen, I've identified areas for future improvements in certain profiles.
How to Access Your Download Link
If you bought the product, please check your email inbox and spam folders for the download link. In the case my emails are in the spam folders, please mark me as 'not spam', otherwise you will miss all my future emails as well. If you haven't received an email, then please contact me and I will prepare a private one for you. Thanks!
Important Note: All Future Updates Included
Once you purchase the custom picture profile pack, you'll automatically receive all future updates at no additional cost. This ensures you always have access to the latest improvements and new film recipes as they're developed.
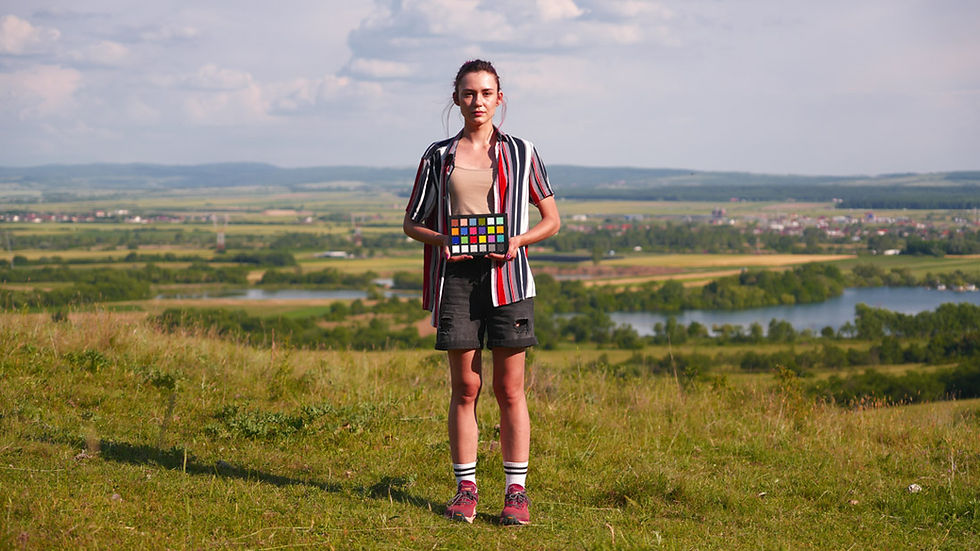
As with previous updates, I chose a location rich in color variety to demonstrate how these recipes perform in real-world conditions. The comparison shoot lasted nearly four hours, so you'll notice subtle changes in lighting throughout the samples.
Skin tones are great in spite of the green cast given by the grass surrounding the model. It's May, so the greens are still pretty lush and vibrant at this point, soon to be dusted off by the warmth and draft of the summer. I honestly enjoyed the results showcased in the last comparison much more. Those seemed nicer to my eyes because the light was softer in autumn and there was a yellow-amber cast from the dry grass in the woods. That being said, this particular scenario is not necessarily a bad thing, as it's showcases how well these film simulations handle colors and dynamic range even in harsh situations.
So without further ado, let's see the results. At the time of publishing this article, there are a total of 66 Sony film recipes.
Table of contents
Best Sony Picture Profiles - a real-life comparison of the updated simulations
Sony a6700 - with 16-55mm f2.8 G lens - SEL1655G
All shots are SOOC, shot in HEIF 4:2:2, then exported at web size for faster loading.
Sony Standard 5500K Sunny & Cloudy on a shade


Vektro 100 Film Recipe

Senova Light Film recipe

Fuji400H Picture Profile

Did you know you can try this one for free? Check out the 8 free film simulations for Sony cameras!
EvPro+ Picture Profile

Ektar 100 Picture Profile

See more JPEGs of the Ektar 100 Picture Profile!

Kodak Portra 800


Kodak Portra 160


Leicachrome Picture Profile

Sony Eterna

Fuji Eterna Picture Profile

Classic Chrome Picture Profile

Astia
Velvia pro


Sony Provia


Acros XY

Acros XR

Acros XG


Nostalgic Neg


Oktar

Zero Mute


ProColor

CineStill 50D / Blue Velvet

Cinestill 800T Picture Profile

Cinestill X

Kodak T-Max 100

Ilford Delta 3200

KosmoPan

Chroma Fade

Kodak Tri-X 1600

Kodak Tri-X 400

NeoMax

Ilford HP5

Midred Infra

DreamNeg


RedScale Ultra

Zetra 100

Rose Spectra

Asteroid City

Ayon 200

Phoenix Harman

Phenomena
Crimson

Acidnom

Estra 500

Arista EDU

X-Tar

Magic Spice

Amarelo 30D

GAF 500

Vespera - Night

Veniliqum - Night

Gold Luxe - Night

FAQs
What Are Sony Picture Profiles?
Sony Picture Profiles are pre-configured settings available in Sony cameras - mainly used for videos to control the color, contrast, sharpness, and gamma of the footage. These profiles allow you to achieve different looks straight out of the camera or provide a starting point for further color grading in post-production. But you can also use them to create your custom picture profile presets. Check out this explanation of the Picture Profile menu & learn how to create your own!
Why doesn’t anyone use Picture Profiles for stills?
Well, for starters, Sony doesn't really market them as being suitable for photography. So that might be one reason why. But it's also because the workflow of using these Picture Profiles to create in-camera cinematic looks isn't exactly intuitive, there's quite a steep a learning curve, and up until recently, you could barely find any information online about creating these looks using the Picture Profile menu. However, once you get the hang of it, you'll find them super flexible.
Do Sony picture profiles affect RAW photos?
To a certain degree. Some settings will be transferred on to the raw file, but most are not. Lightroom or Capture One will try to interpret settings like the Kelvin, Color Filter, and the Gamma used. But all the other settings will be lost in the translation, and it won't be near a match when comparing to the in-camera JPG file.
The biggest difference can be seen in the Gamma options. S-log, HLG and Cine gammas will alter the raw file, changing the way editing software interpret the brightness captured.
Use the Film Presets for a quick and easy workflow
If you also want to shoot RAW and get the look of the in-camera film emulation - for a professional project for example, I'm in the process of updating the film presets for Lightroom and Capture One. All you have to do is select the preset and choose the film emulation you shot with, and it will bring your RAW closer to the in-camera look. No tedious color grading required.
Worth mentioning these recipes were calibrated on the Sony a6700, and like any presets, might render different colors on different cameras. That is because each camera has its own color science. Most differences will be seen when using these film presets with older cameras. That is perfectly normal as Sony kept improving the color science throughout the years. It is not possible for a preset to take all the cameras and match them all in the same color mapping. That has to be done manually, which in most cases is not a big deal. These presets were created to closely match the Sony a6700 raw files to the in camera film simulation. This camera model shares virtually the same color science as other newly release models, like the Sony a7C II, a7CR, ZV-E10, A7RV, a9, a1 and so on. The ones which will be seeing most differences, are the older Sony models. a7III, a7C, a7SIII, a7RIII and so on.
P.S - these are not LUTs, but photo presets - meaning they are fully flexible, and pack the power to adjust multiple parameters for a truly seamless, film-like final image. And by playing around with the variants, you'll get a more refined look.
My favorite Sony Picture Profile?
Well, this is a continuously changing answer - but at the moment I'm obsessed with the Ayon 200, Kodachrome, Fortia, and Kodak Gold for color recipes. As far as black and white recipes go, my current picks are - the Kodak Tri-x 1600, Cinestill X, X-Tarr, and Chromafade.
Shoot More. Edit Less
Hope this comparison helps you understand the differences between all my custom Sony Picture Profiles!
Use this guide in tandem with the official Sony Film Simulation Chart to pinpoint the perfect look for your project. Whether you're after the moody tones of Tri-X or the vibrant punch of Velvia, you'll know exactly which Sony Picture Profile to reach for.
Sony Film Simulation Tutorials
Here is a playlist with short form content showcasing the basic workflow.
Check it out!


Cool - so when are these film sims coming back online for purchase?
Just tried out the Porta 800, nice work!
Will these recipes work on the Sony A6400